Showing posts with label Paper Smooches. Show all posts

Sunday, December 29, 2013

A 2 for 1 Day

Hi, everyone.

I so loved today's sketch that I made a general sentiment card in addition to my normal Sunday-sketch Any Hero card. Both cards share the same palette. In addition, I used the same paper for both backgrounds, but used two types of embossing for the top and bottom portions on both cards.

Paper Smooches (Group Hugs) sentiment on watercolor paper, heat embossed in Distress Ink
Distress Ink core paper; Bazzill black; Sizzix embossing folders
Really Reasonable Ribbon; Tombow foam adhesives
Spellbinders Nestabillities; Creative Memories circle cutting system

Deep Red cling stamps (designed by Sandy), heat embossed in SU white powder
Distress Ink core paper, Bazzill black; Paper Smooches ribbon
Cuttlebug and Sizzix embossing folders; Tombow foam adhesives

Thought the first card might be sent from a daddy to his little (tweener) girl back home. Or, maybe it might be sent from one of our female troops to a girlfriend needing a pick-me-up from a good friend.

I took a few liberties with the second card, but stayed with the spirit of the sketch. It is a little atypical for me to make an Any Hero card using nontraditional (non-patriotic) colors, but I like the result.
Parting Thoughts

Looking forward to the Top 13 of 2013 OWH Bloghop on Wednesday.

Also looking forward to a new challenge blog that Bobbi (of Bobbi's Treasure) and I are starting on Wednesday.

Enjoy the rest of your weekend. As always, thanks for stopping and happy scrappin'!

Wednesday, December 18, 2013

CHA, CHA, CHA

Hi, everyone.

It's that time of year when Sandy prepares for OWH's trip to CHA. An all-call went out for kits, so I came up with the kits shown below. Tried for a little variety: gender-neutral thank you, kid-friendly greeting, and girlie-girlie miss you.

Bee: Paper Smooches, Distress Ink core, SU ef, computer-generated sentiments, garage sale brad
Map: SU background stamp on watercolor paper, DI core, SU brads, stash ribbon
Miss You: Martha Stewart punch, TPC Studio sentiment, DI core, Sizzix ef, Paper Studio brads

I'm hoping at least one of these makes it to CHA. But, it's good to know that all cards will be assembled and make their way to troops one way or the other. Think I'm going to link up the little bee for today's Midweek Throwdown to make a love card for a little one. The "Hi, Honey" counts... right?

Tis the season to post and run! Thanks for stopping and happy scrappin'!

Monday, December 2, 2013

What did Poppa Bee Say to Baby Bee?

Answer: Bee Mine  :)

Hi, everyone.

The inspirations for today's card were an adorable Paper Smooches stamp set and the desire to make some kid-friendly Valentine's Day cards for Operation Write Home.

Paper Smooches images and sentiment stamped on watercolor paper in Distress Ink
Distress Ink core paper; SU Sizzix embossing folder
embossed paper sponged in Distress Inks with SU daubers
stash ribbon; garage sale brad; mini glue dots

I like the pairing of the poppa (or momma) bee and baby bee. But, when I went to put together the elements of this card, I realized just how big the parent bee really is for an A2 card. Should I decide to do a version 2.0 of this card, I might actually print out a slightly smaller version of the bees and sentiment.

I played around with several color combos for sentiment background paper. It felt like there needed to be a piece of white between the brown and red. In the end, the three background papers seem to help bring my eye to the sentiment since the bees and heart make such a strong image.

I tried to create a single focal point -- or at least a flow to the card, by having the bee image touch the sentiment, and the sentiment touch the ribbon.

Speaking of the ribbon... Isn't it amazing how things like this ribbon look so crooked when you see them in a pic?

Oh well, think there's a little one who will love receiving this from their mommy or daddy -- crooked ribbon and all. :)


Thanks for stopping and happy scrappin'! Have a great week.

Friday, November 22, 2013

8 Packages Tied Up in a Bow

Hi, everyone. Happy weekend!

The card below was inspired by this week's OWH Midweek Throwdown to make a masculine birthday card and CAS-ual Fridays' challenge to make a card featuring eight of something -- in this case, 8 birthday packages all tied up in a bow.

DCWV Natural matstack with foil
Paper Smooches twine
Paper Studio brads

Pretty pleased with the way this one turned out. Really love all the textures with the foil in the paper, the twine, and the brads. Hope it will brighten the day of one of a troop's loved one.

Parting Thoughts

Will try to make some time to write about this week's craft show. And, then there's a post-craft-show craft room that needs some cleaning up. :)

Thanks for stopping and happy scrappin'!

Wednesday, November 13, 2013

Bee Mine -- Take 2

Hi, everyone.

This week's OWH Midweek Throwdown is to make a card using dry embossing. Just loved Carols' sample card.

As for my contribution... Sounded like another great opportunity to stamp some little bees.

Distress Ink core, embossed with Sizzix/SU embossing folder
Paper Smooches images stamped in Distress Ink

Inside of Card

waterfall card
These three panels on the front, and the inside sentiment, make up the four panels on this waterfall card from the other day.

And, I don't usually include onside sentiments for OWH cards. But, these little bees really needed a little extra pizzazz on the inside. :)

I'm really liking the concept of the card, but am not so happy with the dimensions of the panels on the front. Think I may give this another try using two circles and an oval...


Parting Thoughts

Another short and sweet post. Still trying to recover from last week's festivities. And, gotta make some card bases for next week's craft show and e-mail a friend about a possible December Girl Get-Together.

Thanks for stopping and happy scrappin'!

Monday, November 11, 2013

Bee Mine

Hi, everyone.

For those of us who make cards for Operation Write Home, Veteran's Day is bittersweet. A heartfelt thanks to those who have served and sacrificed for our country.

This month's Our Daily Bread Design OWH challenge is to make a love card. Yes, while the rest of the world is thinking turkey and pumpkin pie, OWHers are thinking Valentine's Day cards for our troops.

Paper Smooches stamp set, heat embossed in Distress Inks
Distress Ink core paper, embossed with Sizzix folder

The card above was inspired by a technique learned in one of Bernadette's Stampin' Up! classes -- making a waterfall card. Honestly, my brain is too fried from today at work to even begin to try and explain the card. But, if you're interested in learning more about waterfall cards, a quick Google search will turn up some videos. :)

The images below show the panels that pulling on the tab will reveal.


Since this card is going to a troop to write home to a loved one, I wanted to include a little writing room. The image below shows the back of the card.


What's not to love about a card that combines Paper Smooches stamps, Distress Ink core paper, Distress Inks, and embossing?!

Think CAS-ual Fridays has an embossing challenge going on -- and Paper Smooches has a guest designer challenge. If so, this little card might just end up on both of those sites.

Parting Thoughts

So glad I was able to get a card made for the ODBD challenge. Would hate to miss that.

Thanks for stopping and happy scrappin'!

Saturday, August 17, 2013

You've Got Mail :)

Hi, everyone.

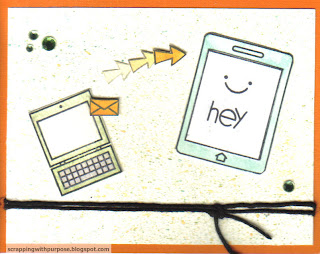
Tonight's card was inspired by the CAS-ual Fridays challenge to make a card featuring green, aqua, and orange.

watercolor paper, Distress Ink core paper
Paper Smooches Teen Scene images
StazOn jet black ink, watered down acrylics
Darice jewelry hemp cord, miscellaneous gems


The card is a stripped down version of a card that I made earlier in the week for an OWH friend challenge. While I switched from cardstock to watercolor paper, many of the same techniques -- including the first generation/second generation/third generation stamping and the layering of papers (one layer/two layers/three layers) used for the arrows. (I really am thrilled with these little arrows!)

I found a sheet of designer paper with an aqua, green, orange, and pink palette that I really liked. The colors used to paint this card's images were created by blending various acrylics with light ivory and/or light black. The background was created by spattering the blended acrylics with a toothbrush. I chose an orange cardstock base to pop the orange in the envelope and arrows.

UPDATE: Still tweaking...
Kinda of liking v2.1.
Which do you prefer?
While I love the way the laptop, computer, and arrows turned out, I'm still not quite sure about the finishing touches.
  • The first decision was to let the images speak for themselves and not include a sentiment. 
  • Then, I went back and forth between lots of different ribbons and twines, before deciding on the black hemp cord to ground the card and bring out the black stamping. 
  • I also went back and forth between various gems and sequins, before deciding on the green gems shown here. (Black rhinestones seemed like too much, pearls seemed too formal, and the sequins didn't feel quite right. These little green gems have actually been in my stash for quite a while. So, it was nice to get to use them.)

Still trying to decide whether this little card is going to Operation Write Home or to a friend. Tough decision... But, since I originally got this stamp set to make cards for teens for OWH, think OWH is going to win. :)

UPDATED 09/05/2013: Think I'll post these little devices to this month's Paper Smooches Guest Designer Challenge.

Parting Thoughts

Enjoy the rest of the weekend!

Thanks for stopping and happy scrappin'!

Thursday, August 15, 2013

friend 2 friend

Hi, everyone.

This week's OWH Midweek Throwdown challenge is to make a friend-themed card. I decided to go all girlie, girlie for this one!  :)

Stampin' Up! garage-sale-find dp; AC cardstock
Paper Smooches stamps: Teen Scene and Alphadot, in Staz On jet black
Glossy Accents; Fiskars border punch; Marvy circle punch

I'm thrilled with the way this turned out...but it sure was a long and winding road. And, the arduous journey really surprised me because I knew early on that I wanted to use some fun Stampin' Up! paper and these adorable Paper Smooches Teen Scene stamps. But, choosing the right cardstock to complement the paper, the exact combination of stamps, and getting the stamping to look halfway decent... Well, all of that took quite a while.  : )

Tip for the Day: I taped along the edges of the screens and envelope before applying Glossy Accents.

Moments of Inspiration: Inspiration hit when I realized I should use a first generation/second generation/third generation stamping technique on the arrows. Inspiration hit again when I decided to make the middle arrow 2-ply thick, and the right arrow 3-ply thick.

Think I'll post this at Paper Smooches.

Parting Thoughts

UPDATE: Just learned there was a Facebook part of the challenge to make a masculine card. Since hubby and I are probably the only people on the planet that doesn't do FB, I messed up that part of the challenge. Sorry about that!

Not much else to say. Pretty tired after a taxing day at work.

Thanks for stopping and happy scrappin'!

Saturday, August 3, 2013

Have a Super Day!

Hi, everyone.

This card has been rattling around in my brain ever since the adorable Paper Smooches Super! stamp set released. (This is actually a second version using the Paper Smooches Alphadots stamp set.) And, even though I just ordered a set of the newly released dies that go with the stamp set, I couldn't pass up the chance to (literally) piece this together while I had some serious time to work on it.


Paper Smooches Super! stamp set in StazOn jet black
Distress Ink core paper (red, yellow, blue)
Bazzill black cardstock
Tombow foam squares behind super hero and buildings on right
LOTS of fussy cutting

Paper Smooches Super! and Alphadots stamp sets in StazOn jet black
Distress Ink core paper (red, yellow, blue)
stash white and black cardstock
computer generated shapes, requiring even more fussy cutting
(For details on making this popped-up sentiment, please click here)

Since this is going to Operation Write Home, I added a white strip to the bottom of the inside of the card for mommy or daddy to write a note to their super hero back home in the States.

So, with the popped-up sentiment and all of the fussy cutting, this little card was pretty labor intensive. And yet I can't help but smile when I think about the little super hero who's going to love getting this card from his mom or dad.  :)

Think I'm posting the card for this month's Paper Smooches Guest Designer Challenge.

Parting Thoughts

It's sure to be a super weekend around here. Hubby and I are celebrating 29 years of marriage tomorrow and my dad is celebrating his 79th birthday!  :)

Have a great weekend! Thanks for stopping and happy scrappin'!

Saturday, June 15, 2013

Hello, Honey!

Hi, everyone.

Update on 7/8/2013: Just came across a guest designer challenge on the Paper Smooches site. Think I'm going to go out on a limb and post this little honey of a card. 

Well, brother and family got a late start and their arrival is later than originally planned. So, what's a gal to do with a couple of bonus hours? Make a card!

This bonus card is made from another one of those fabulous Paper Smooches blog candy stamp sets. The set I used for this card is Bee Mine, paired with a great Stampin' Up! embossing folder.

Paper Smooches Bee Mine stamps and ribbons
Stampin' Up embossing folder and neutral brads
Distress Ink core paper (scattered straw and fired brick)
Distress Ink, heat embossed with clear powder and sponged
Zots 3D glue dots, Elmer Craft Fabric Glue

The inside of the folder was inked up with Distress Ink vintage photo. After running Distress Ink scattered straw through the embosser, the paper was heat embossed with clear powder. Then, I sponged on wild honey and antique linen with SU sponge daubers. The heat-embossed bee, heart, and sentiment were
stamped in vintage photo and/or fired brick.

Since this is a thing with wings, I'm going to try posting this card to OWH's Midweek Throwdown. Not sure if it will work since I've already posted the card at the right. Crossing my fingers.  :) 

Parting Thoughts

Still looking forward to seeing my brother and his family. Thinking they should be getting in to Dad's right about now.

Have a wonderful Father's Day with family and loved ones.

Thanks for stopping and happy scrappin'!

Lil Monster

Hi, everyone!

Isn't it interesting how the excitement about something keeps you up late and gets you up early? I'm so very excited about my brother's family's visit that I had trouble falling asleep -- and even more trouble getting back to sleep!

The other thing that had my motor running was the desire to ink up some new stamps. The Paper Smooches blog candy from OWH's Memorial Day blog hop came this week. (The delay was totally mine, by the way. Once I finally decided on what to get, the package arrived within days! Kim was fabulous!!! Thanks, Kim.) I also wanted to ink up some newly purchased Stampin' Up! stamps.

So, as it turned out, I've had time to sneak in one last card before the visit begins. :)  The card below is for this month's OWH Design Bootcamp on repetition -- and variation -- and a strong focal point.

Lil Monster

Paper Smooches Alphadot stamp set and natural ribbons; 
Stampin' Up! Build a Monster stamp set
Cosmo Cricket Matilda dp; Distress Ink core paper;
Distress Ink black soot, heat embossed with clear powder
EK border punch; Zots 3D glue dots, Zig 2 Way Glue


A description of the thought process behind this card's design follows:
  • The first decision was to make three lil monsters in the same shape and same color, but varied in features. There is also a slight variation in the sanding of the left and right monsters, while keeping the center monster at 100% saturation.
  • The second decision was in paper selection. I didn't have any space- or monster-related dp in my stash. But, then I remembered the Matilda halloween collection had some really fun colors and patterns. Looking at the patterns I had left from the pad -- and the complementary cardstock papers in my stash, I decided to go with the orange/gold/purple plaid. The plaid seemed playful, gender neutral, and unexpected. Two other important considerations: the plaid was non-Halloween'ish and it "popped" the lil monsters.
  • I repeated the monster's purple in the background of the top portion of the card and around the paper and sentiment on the bottom portion of the card. 
  • A pair of natural ribbons were placed behind the monsters to connect them and make a stronger focal point without adding an additional color or pattern. I also liked the extra texture the ribbon brought to the card.
  • To adhere the monsters, I used 2 Way glue on their main bodies and glue dots on their eye and leg appendages. They have to be pretty secure for little hands. :)
  • This fun font from Paper Smooches was just right for these little guys. It is stamped on the reverse side of a Distress Ink core green that matched a green used in other papers in the dp collection. I chose to not heat emboss -- deciding to use that little extra shimmer for just the monsters.
  • So, you'd think I would be done. Not so fast... The top corners felt like they needed something, but I never put brads or gems on kid cards. And, then I saw the cute little trio of dots in the Stampin' Up! monster set. I stamped those in the corners, heat embossing so that they would pop off the plaid paper.
Here's hoping a hero's little one will smile when receiving these little guys in the mail.

Parting Thoughts

Wow, this post got a little longer than I expected. Sorry about that! (Can you tell I'm really psyched about my brother's visit?!)

Thanks to Paula for these Design Bootcamps. They are great!

Another huge thanks to Paper Smooches for all they do for OWH. For my blog candy, I ordered three sets that would address some OWH needs: a fun alphabet, the Teen Scene images, and the Bee Mine set (to go with a honeycomb embossing folder.) Kim, the stamps are fabulous and you totally rock!

Speaking of that honeycomb folder,  a big thanks also goes to Bernadette, a central Ohio Stampin' Up! demonstrator. My stamping is getting better thanks to her help. If only I could say the same about my checking account....

Have a great weekend! REALLY looking forward to celebrating Father's Day with both dads and my brother and his family.

Thanks for stoppin' and happy scrappin'!